How to Create Seasonal Catalogues in Shopify for Use in Meta Ad Campaigns

Running seasonal campaigns on Meta (Facebook and Instagram) can lift your e-commerce sales, but managing product catalogues for different seasons takes work. This guide walks you through creating and optimising seasonal catalogues in Shopify that feed into your Meta ad campaigns.
Why Seasonal Catalogues Matter
Seasonal catalogues let you show the products people actually want at that time of year. Instead of manually updating your whole catalogue or building new campaigns from scratch each season, you can prepare organised collections and product sets that stay in sync with Meta’s Commerce Manager.
Step 1: Organise Your Products in Shopify
Before creating your seasonal catalogue, you need to organise your products properly in Shopify.
Creating Seasonal Collections
Navigate to Products > Collections in your Shopify admin panel. Click “Create collection” and set up automated collections based on seasonal criteria.
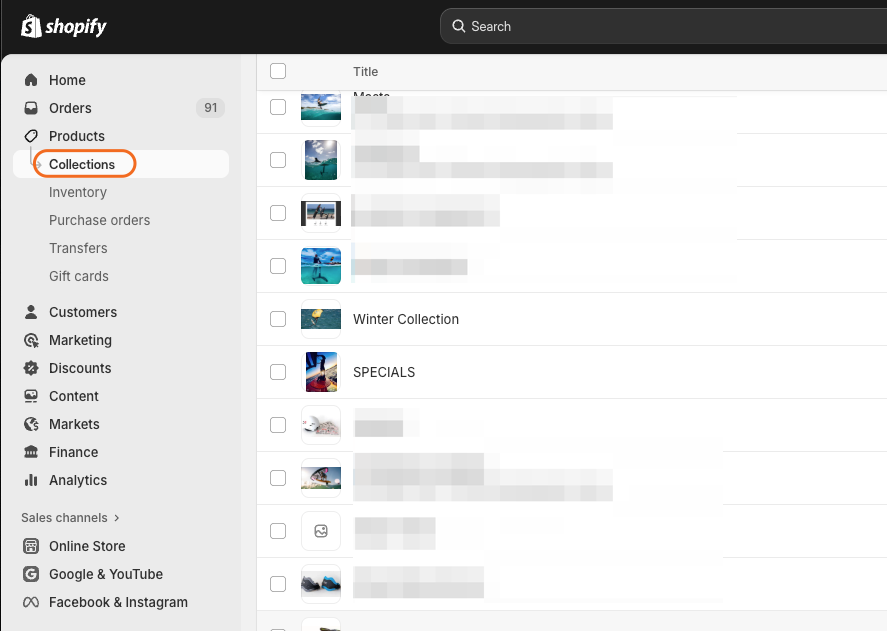
For your seasonal collection, consider using automated conditions such as:
- Product tags (e.g., “summer-2026”, “christmas-gifts”, “back-to-school”)
- Product type combinations
- Inventory levels
- Price ranges specific to seasonal promotions
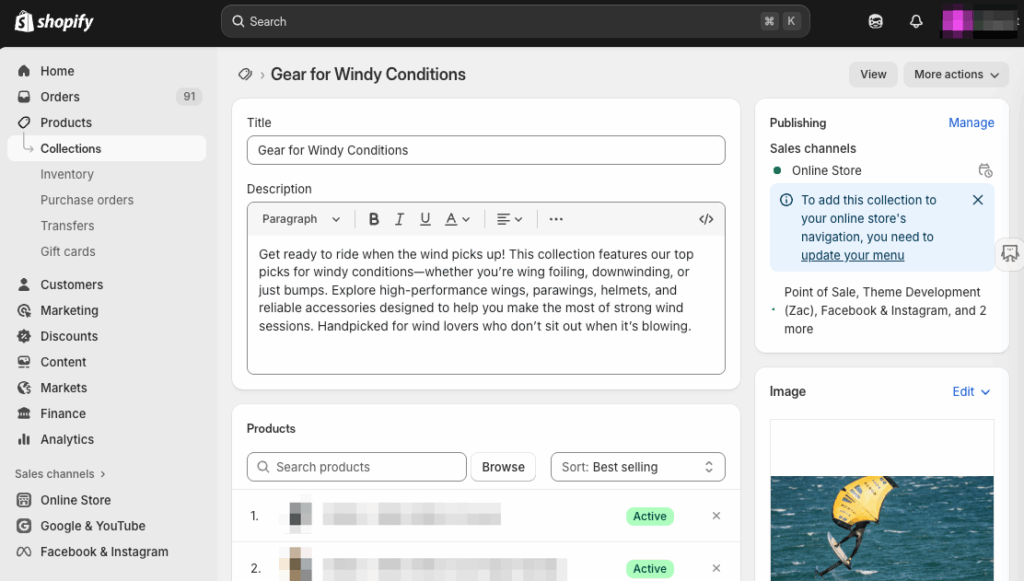
Name your collections clearly, such as “Winter 2026 Collection” or “Christmas Gift Guide 2026”. This organisation will be crucial when setting up your Meta catalogue.
Adding Seasonal Product Tags
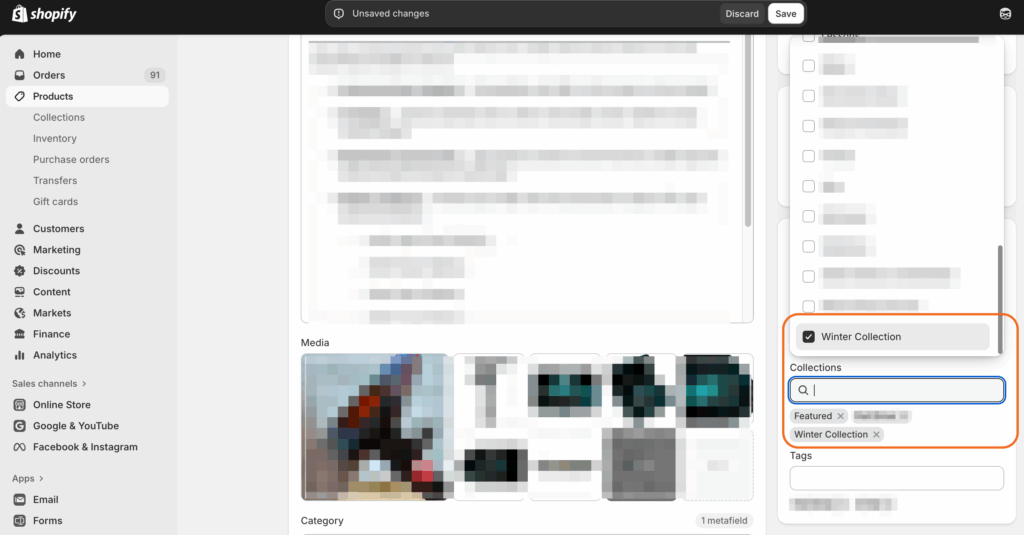
Product tags are your best friend for seasonal catalogue management. Go to each product and add relevant seasonal tags in the “Organization” section of the product page.
Recommended tagging structure:
- Season + Year (e.g., “spring-2026”)
- Holiday specific (e.g., “mothers-day”, “black-friday”)
- Weather-based (e.g., “cold-weather”, “beach-ready”)
- Occasion-based (e.g., “graduation-gifts”, “wedding-season”)
Step 2: Set Up the Facebook & Instagram App in Shopify
If you haven’t already, install the Facebook & Instagram app (by Meta) from the Shopify App Store. It used to be called the Facebook channel. It connects your Shopify products to Meta’s advertising platform.
Open Sales channels > Facebook & Instagram in your Shopify admin and follow the connection process to link your Meta business portfolio (formerly Business Manager).
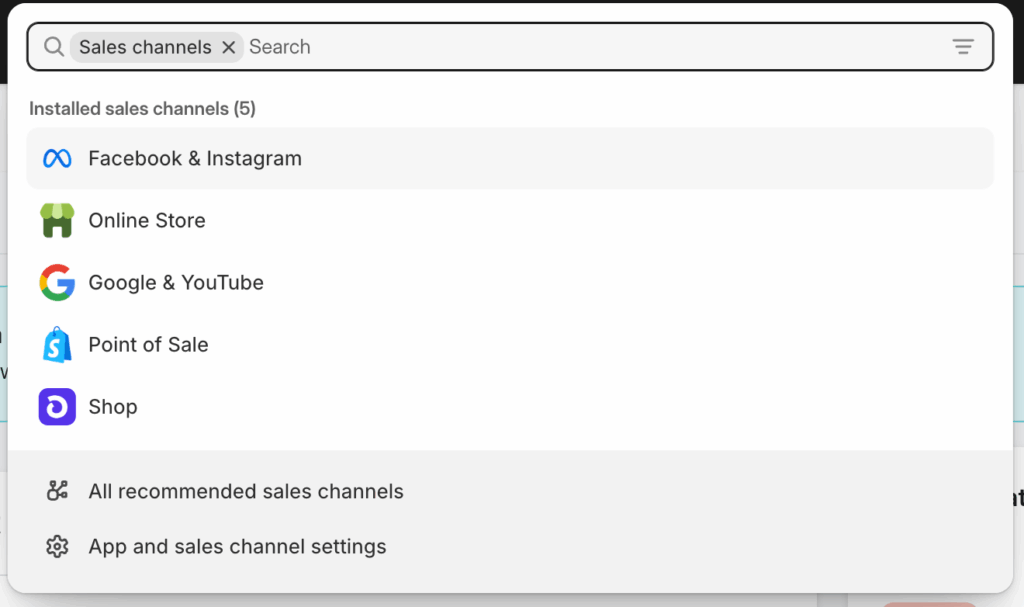
Once connected, you’ll see options for:
- Shop setup
- Marketing activities
- Commerce Manager access
- Product syncing preferences
Make sure product syncing is turned on so your Meta catalogue stays up to date. Exact menu labels change from time to time, so look for the sync setting if the wording differs.
Step 3: Configure Product Sets in Meta Commerce Manager
Next, create seasonal product sets within Meta’s Commerce Manager.
Accessing Commerce Manager
From your Meta Business Suite, navigate to Data Sources > Catalogue.
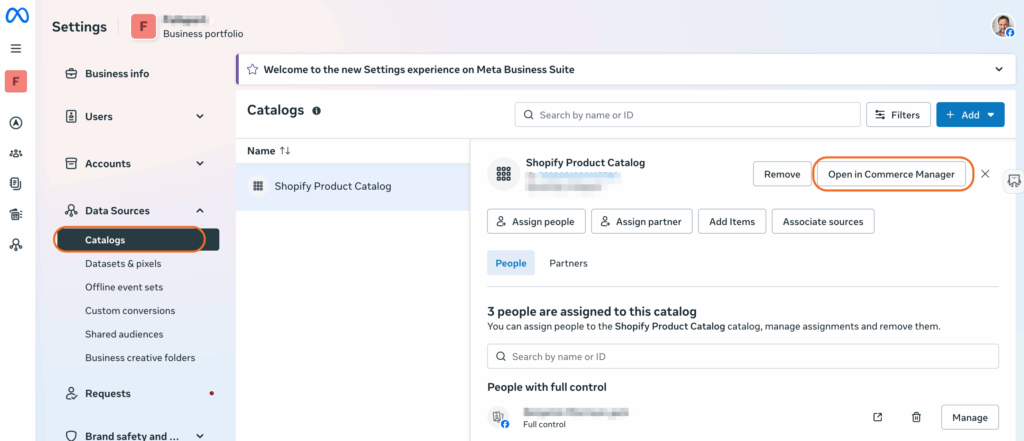
Click Open in Commerce Manager to access the Meta Catalogue Commerce Manager.
Creating Seasonal Product Sets
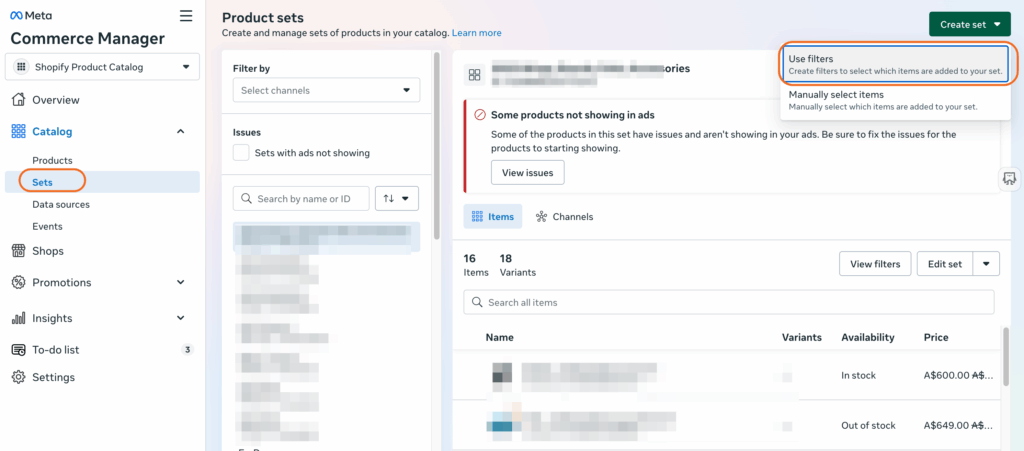
Click on “Sets” in the left menu, then “Create Set”. This is where you’ll define your seasonal catalogues.
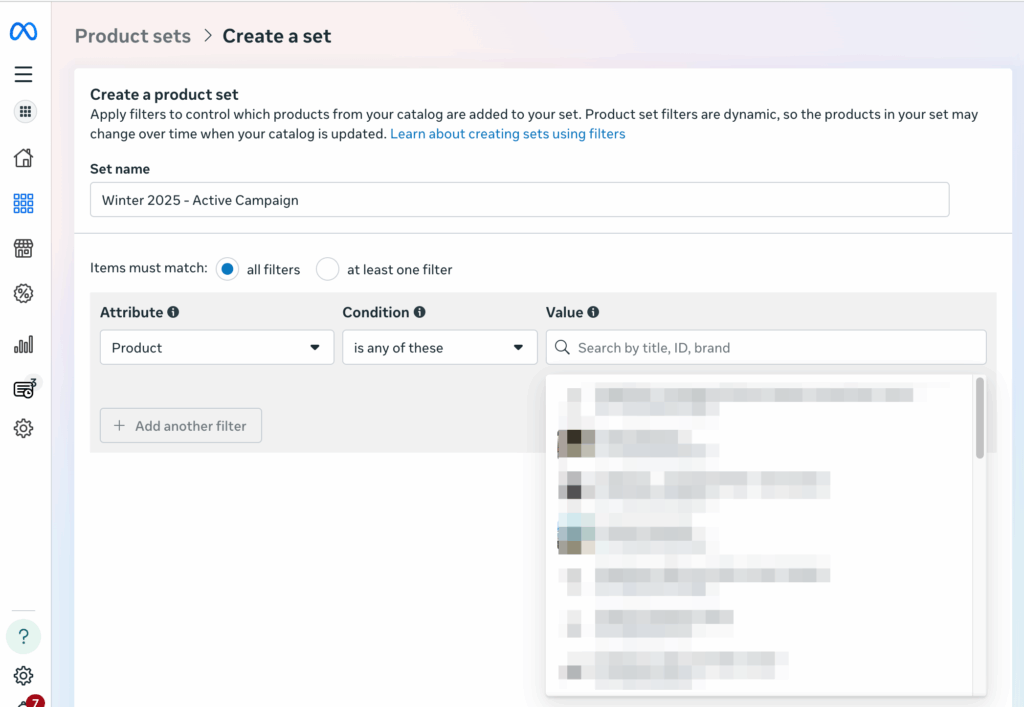
Choose “Use filters” to create dynamic sets that update automatically as products change. Set your filters based on:
- Product type or category
- Custom labels (Custom Label 0 to 4)
- Availability status
- Price ranges
Custom labels are the most flexible option, but whether your Shopify tags reach them depends on how your app and feed are set up. Open a few products in Commerce Manager and check which fields your tags actually populate before you build sets on them. If your tags don’t come through, filter on product type instead or add the labels through a supplementary feed.
For example, to create a “Summer 2026” product set:
- Add filter: Custom Label 1 contains “summer-2026”
- Add filter: Availability equals “in stock”
- Add filter: Product type equals your relevant categories
Name your set clearly (e.g., “Winter 2026 – Active Campaign”) so it’s easy to identify when creating ads. You can also add products to a set manually.
Step 4: Create Dynamic Ads with Seasonal Catalogues
With your seasonal product sets ready, it’s time to create dynamic ads that automatically show the right products to the right audience.
Setting Up a Catalogue Sales Campaign
In Meta Ads Manager, create a new campaign with the Sales objective and turn on the catalogue option (Advantage+ catalogue ads), then choose your catalogue.
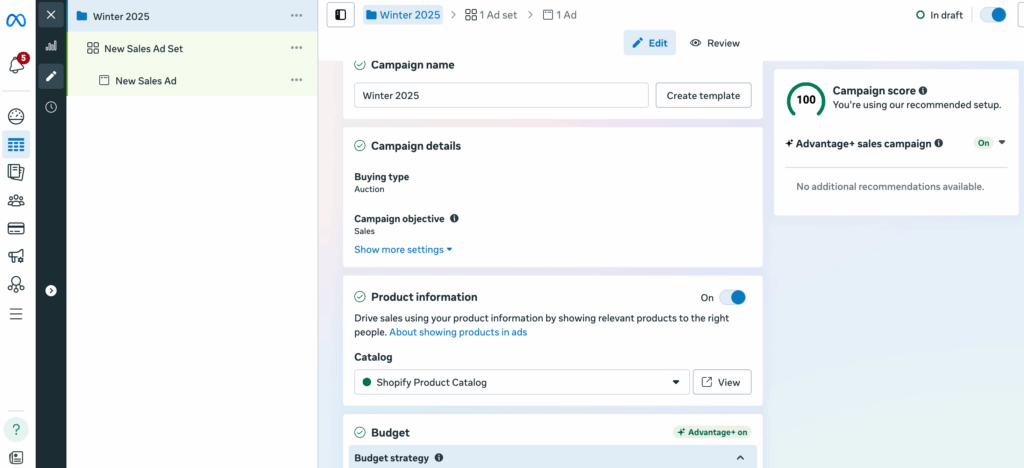
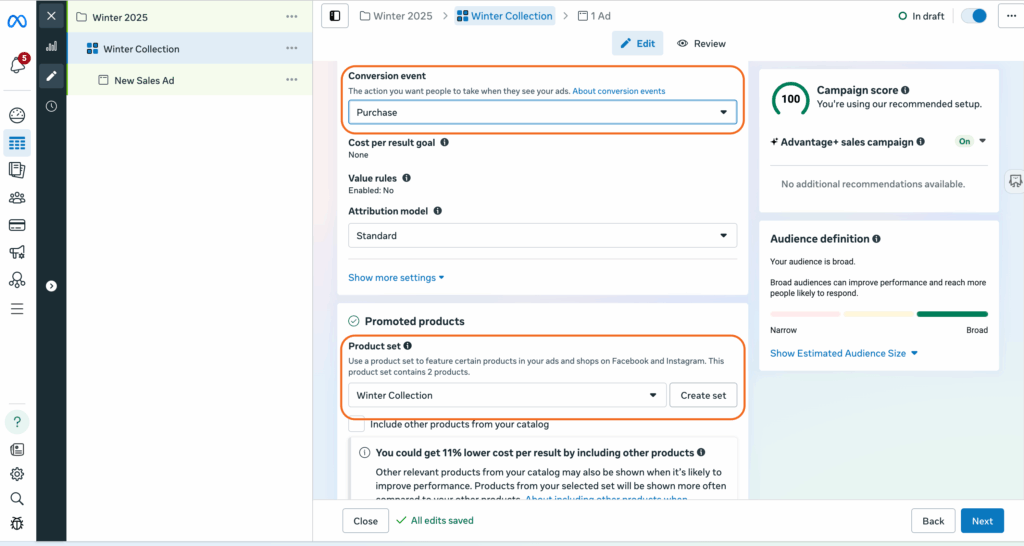
When setting up your ad set:
- Choose your seasonal product set from the dropdown
- Define your audience (consider creating seasonal audiences too)
- Set your performance goal (typically “Maximise number of conversions” under the Sales objective)
- Configure your placement preferences
Creating Seasonal Ad Templates
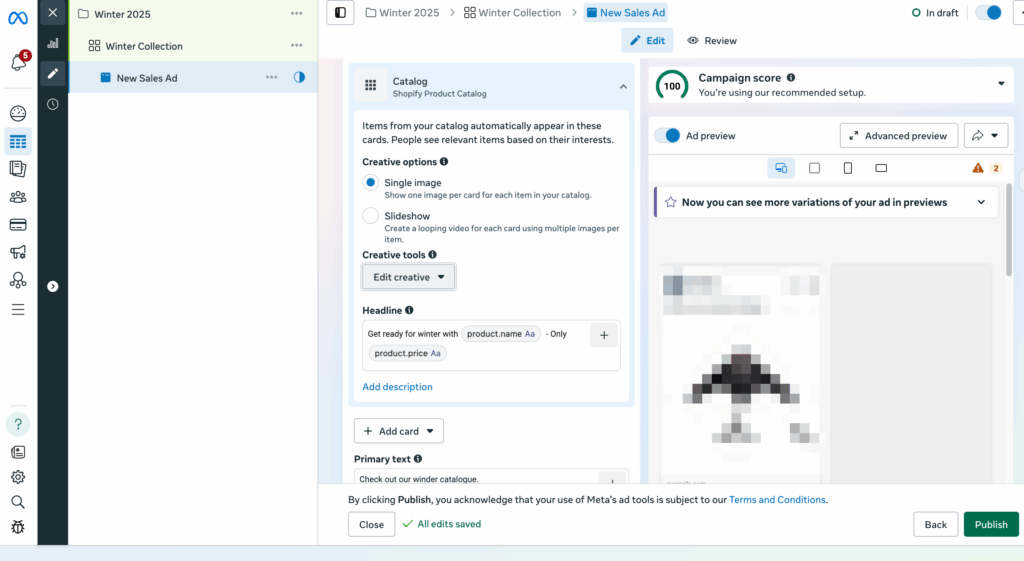
In the ad creation step, you can create templates that automatically pull product information while maintaining seasonal messaging.
Use dynamic parameters like:
- {{product.name}}
- {{product.price}}
- {{product.description}}
Combine these with seasonal copy:
- “Perfect for winter: {{product.name}}”
- “Holiday special – Save on {{product.name}}”
- “Get ready for winter with {{product.name}} – Only {{product.price}}”
Step 5: Automate Seasonal Transitions
To optimise your seasonal catalogue strategy, set up automation rules in both Shopify and Meta.
Shopify Flow Automation
Use Shopify Flow (available on Basic plans and above since 2023, not only Shopify Plus) or third-party apps to automatically:
- Add seasonal tags based on dates
- Move products between collections
- Update inventory status for seasonal items
- Adjust pricing for seasonal promotions
Meta Automated Rules
Meta’s automated rules work from delivery and performance metrics (spend, cost per result, ROAS, frequency and so on) plus a schedule. They can’t see your product set sizes, and they have no weather conditions. Within those limits, you can create rules that:
- Pause seasonal ad sets when cost per result rises above your target
- Increase budget on a schedule for key shopping days
- Turn off ads that have reached a frequency cap
Best Practices for Seasonal Catalogue Management
- Start Early: Prepare your seasonal catalogues well before the season starts. This gives you time to test and optimise.
- Maintain Consistency: Ensure your seasonal tags and labels are consistent across Shopify and Meta to avoid syncing issues.
- Monitor Performance: Use Meta’s Catalogue Insights to track which seasonal products perform best and adjust your sets accordingly.
- Test Different Segments: Create multiple product sets for the same season targeting different audience segments or price points.
- Update Regularly: Even with automation, manually review your seasonal catalogues weekly to ensure accuracy and relevance.
- Plan for Transitions: Have overlap periods where both seasons are running to capture early and late seasonal shoppers.
Troubleshooting Common Issues
Products Not Syncing: Check that the Facebook & Instagram app in Shopify is properly connected and that products meet Meta’s commerce policies.
Wrong Products in Sets: Review your filter logic in Commerce Manager and ensure Shopify tags are correctly applied.
Poor Ad Performance: Test different product sets, adjust your audience targeting, and ensure your seasonal messaging aligns with customer intent.
Going Further: Switching Catalogue Ads On and Off With the Weather
Seasonal catalogues cover the broad shifts across the year. Weather is shorter term. A cold snap in early autumn, a wet long weekend or the first 30°C day of spring can change what people want within a day or two, and seasonal planning can’t see those coming weeks ahead.
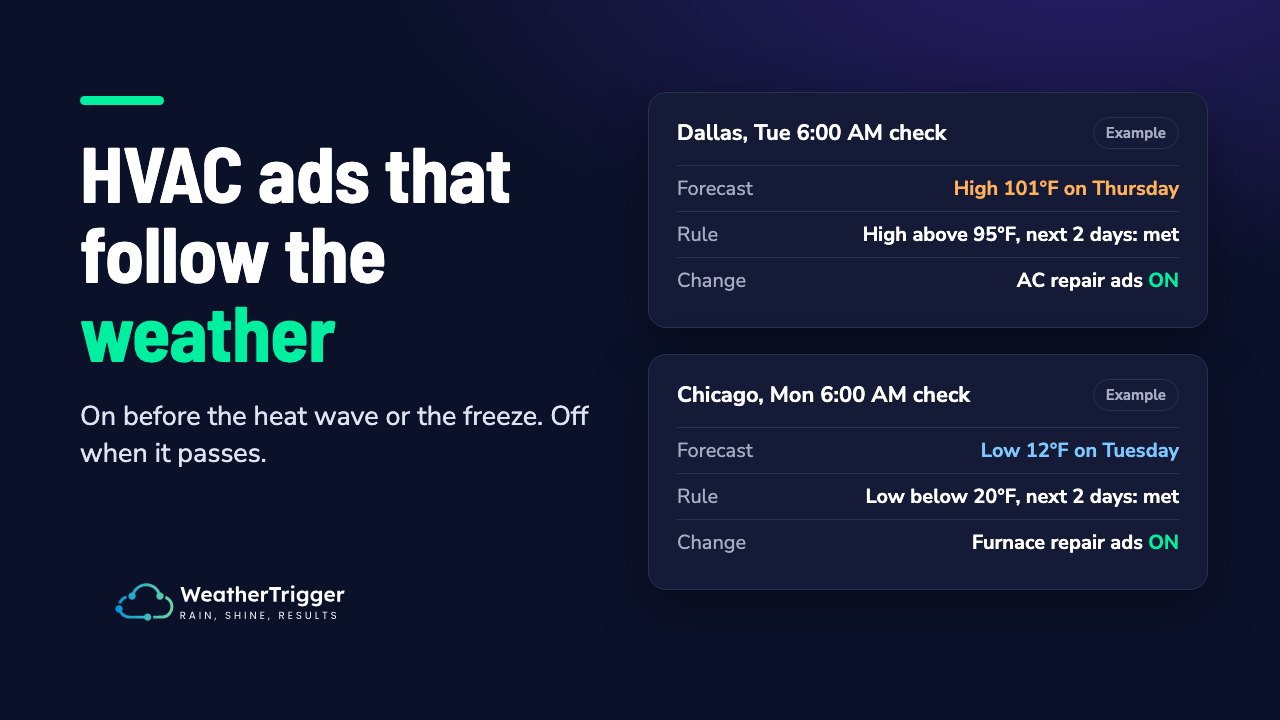
Meta has no weather targeting, and its automated rules have no weather conditions. To respond to the weather, you need a tool that checks the forecast for each location and switches ad sets on or off through the Meta Marketing API. You can build this yourself, set it up with Make.com, or use a dedicated tool like WeatherTrigger.
Setting Up Weather-Responsive Product Sets
Building on the seasonal catalogue structure above, add a weather layer to your Shopify tags. For example:
- “warm-weather” for products that sell on hot days
- “rain-ready” for wet weather essentials
- “cold-snap” for warming products
- “windy-day” for products suited to gusty conditions
Use the same approach as in Step 3: bring these tags into a spare custom label (for example, Custom Label 4) and check in Commerce Manager that they’re coming through. Then create a product set for each weather group.
Connecting Weather to Your Campaigns
The simplest structure is one ad set per weather product set. For example, a “Rain-ready” ad set promoting your rain gear and a “Warm weather” ad set promoting summer products, each targeting the locations you care about.
WeatherTrigger then pauses and resumes those ad sets based on the weather. It doesn’t change budgets, bids, audiences or creative. A few examples of rules:
- Temperature: resume the “Warm weather” ad set when the forecast maximum is above 28°C, and resume a “Cold snap” ad set when it drops below 12°C.
- Rain: resume the “Rain-ready” ad set when the chance of rain today is high or more than a few millimetres is forecast, and pause outdoor furniture ads during a wet week.
- Wind and severe weather: pause ads that would look out of place during a severe weather warning, or resume ads for storm preparation products ahead of a forecast storm.
Rules can use temperature, rain chance, rain and snow amounts, wind speed and gusts, humidity, cloud cover and severe weather alerts, looking at today, the next few days of forecast or the past 24 hours (every trigger explained). You choose how often each rule checks, from every 30 minutes to once a day. With auto-revert on, the ad set switches back once conditions have cleared on two checks in a row. Every check is logged, so you can see the weather reading, whether the rule matched and what action was taken.
Implementation Tips
- Decide which products depend on the weather. Start with one or two clear cases, such as rain gear or summer drinks.
- Create the product sets. Tag the products in Shopify and build the sets in Commerce Manager.
- Give each weather set its own ad set, using ad set budgets rather than an Advantage+ campaign budget. If an ad set inside a campaign budget is paused, Meta moves its spend to the other ad sets instead of saving it.
- Set sensible thresholds. Use local conditions. 28°C in Hobart isn’t the same as 28°C in Darwin.
- Avoid long pauses. Resuming an ad set that has been paused for 7 days or more restarts Meta’s learning phase. Shorter pauses usually don’t.
- Measure the result. Compare weather-triggered ad sets against an always-on version before you decide it works. Our guide to measuring weather-triggered ads explains how.
What to Expect
We don’t publish a standard uplift figure, because the effect depends on your products, your locations and how strongly demand follows the weather. What weather triggers do reliably is stop spend on products people don’t want that day and put the relevant products in front of them when they do. Test it on your own account and let the results decide how far to take it.
By combining Shopify’s seasonal catalogues with weather-based switching, you can respond to both the long-term seasonal pattern and the short-term forecast. WeatherTrigger has a 30-day free trial with no card required. Start your trial.